
What Tools Do You Need To Lay A Solid Wood Floor?
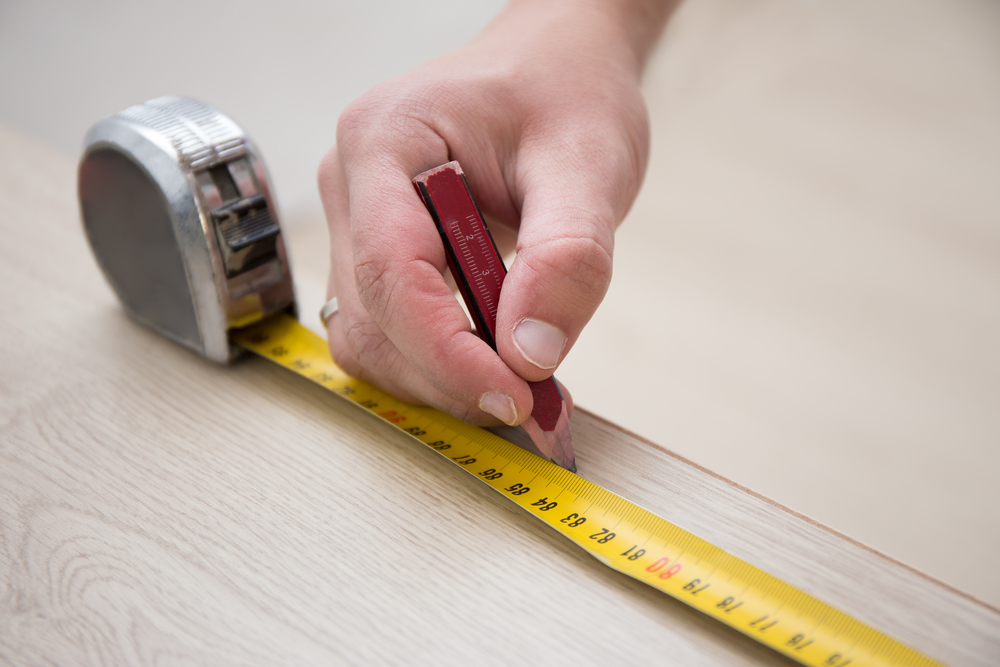
From measuring to glueing there are a few different solid wood flooring tools. To help you get to grips with the exact items, here's our must-have list of tools for laying a solid wood floor:- Tape measure and pencil - for measuring and marking boards.
- Mitre saw - for trimming boards.
- Glue adhesive - to keep your boards flat to the subfloor.
- Trowel - for applying glue adhesive.
- Flooring sealer - to keep moisture away from your wood floors.
- Underlay - if you plan to use floating floors then we recommend underlay.
- Nails and nail-gun - for fastening to wooden subfloors and for attaching trim.
- Rubber hammer - for knocking any stubborn boards into place.
How To Lay Your Solid Wood Floor
Follow these steps to lay a solid wood floor:1. Measure the room and order your floor
 The first step for laying a solid wood floor is making sure you have the right amount of boards to do so.
2. Allow your floor to acclimatise
The first, and most important, tool that is necessary when laying solid wood flooring in your home is patience. The first step to perfect floors is allowing sufficient time for your floorboards to acclimatise to the conditions in your home.Moisture in the air makes floorboards expand slightly, so you’ll need to let the floor get used to the room first. We recommend leaving your flooring out of its packaging, in the intended room, for roughly one week before installing.
 You will also need a lot of patience when it comes to installing solid wood flooring, as the process requires a few steps until completion, all of which take time.
3. Prepare your subfloor
Once the boards have acclimatised you can start the process of laying your solid wood floor, but you will have to prepare first. Once you've made sure your subfloor is level, ensure it is as clean as it can possibly be by hoovering, sweeping, mopping and allowing to air dry. Don't try to tackle this as a quick task. The chances are that you'll be spending a long time on your knees, so invest in knee pads to allow you to so without pain. You'll also be around a lot of sawdust and listening to loud power tools so get hold of a dust mask, safety goggles and some ear defenders for when things start getting messy.4. Remove Skirting Board
Removing your current skirting board with a crowbar allows an expansion gap around the perimeter of the room which lets the new wood expand in different climates. An expansion gap of around 15mm is recommended, to maintain this gap throughout the installation, plastic spacers can help you. After removing skirting, make sure your floor is completely clean and ready for the new solid wood panels.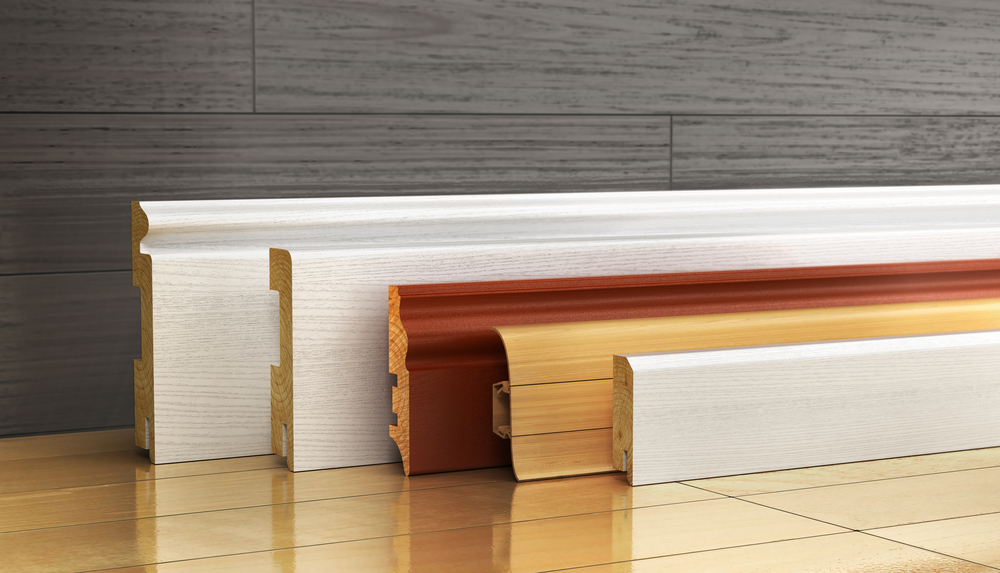
5. Gather your materials
Once you have the necessary wood floor installation tools you will be all set to install your brand new solid wood flooring, which you can find in our solid wood flooring. Other equipment you may need for completing the installation includes varnish and applicators for the varnish. We recommend sealing your solid wood floors with varnish to make sure they're protected from scuffs and light water damage. A minimum of three coats of varnish is recommended, though for areas with high amounts of foot traffic a fourth coat is required.6. Lay your first row of solid wood flooring
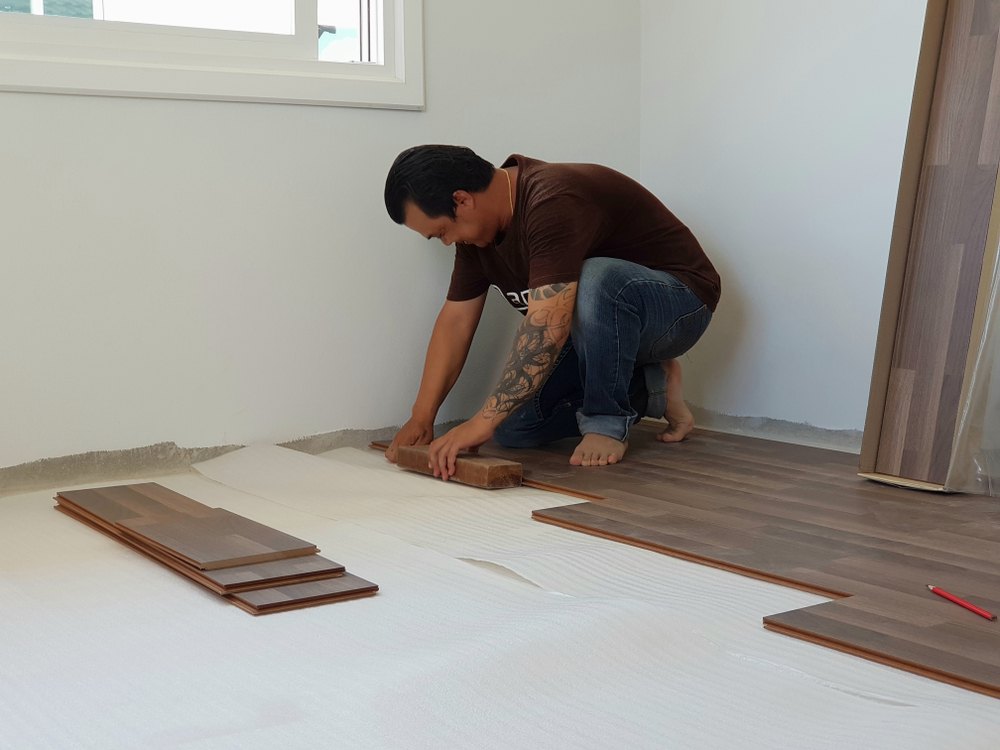 Start from the left-hand corner, fixing the first row of boards. Just remember to leave enough space for expansion. If your chosen boards have tongue and groove edges, ensure the groove is facing the wall and then nail or glue down depending on your subfloor.
- If glueing, apply the glue to the subfloor and the not panels, then spread evenly using a notched trowel. Press down each board firmly as you go along, make sure that the sides are always pressed tightly together and wipe away excess adhesive before it dries.
- If nailing, it’s best to use a nail gun at a 30-degree angle through the tongue of the board and into the subfloor. With both methods, gently use a rubber mallet to knock the boards together for a tight fit.
7. Cut the Boards
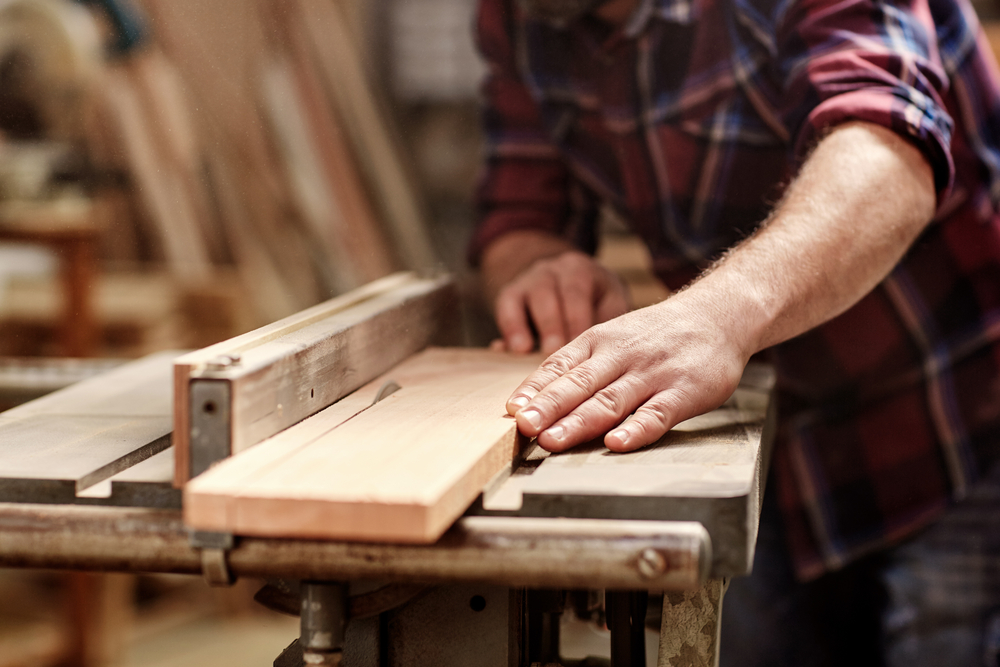 When you reach the end of a row, you’ll likely need to cut the board to fit. Remember to leave enough space for your 15mm expansion gap and then carefully cut with a circular saw. Use what is leftover from this board to start the next row and ensure an equal number of boards.
8. Add Skirting
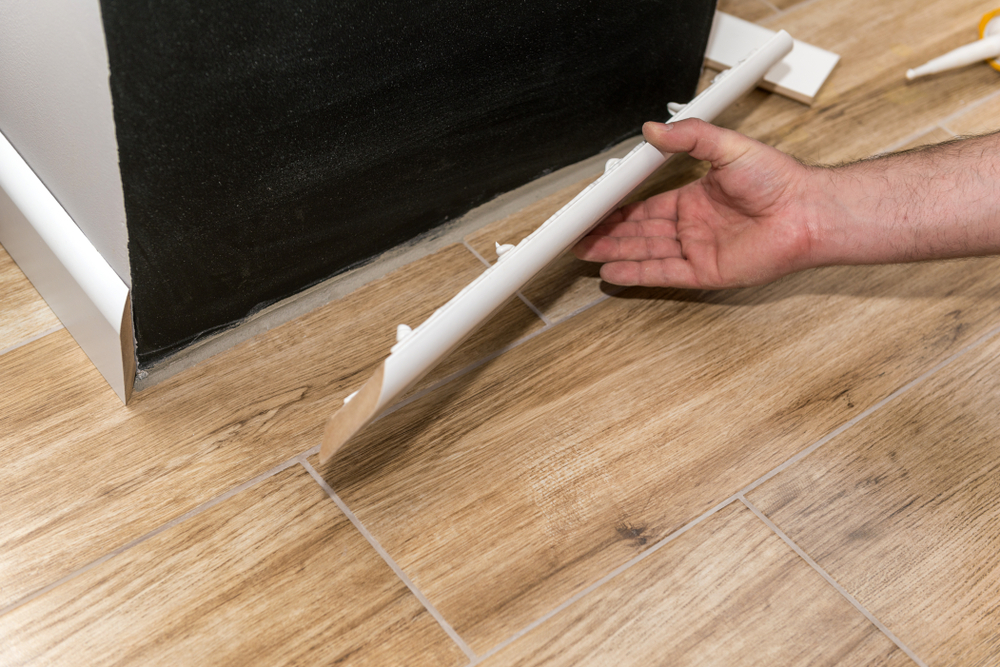 After you’ve laid all your panels, you’ll need to add skirting to fill in the expansion gap. You can either replace your previous skirting board or use this opportunity to get new skirting boards to complement your new wooden floor. At Factory Direct Flooring Ltd, we offer either solid wood skirting or beading in our Accessories section. Fix these into position by using a hammer and a nail. Finally to complete your solid wood flooring installation, polish your new floors to complete your look!