Originally posted 19th July 2016
Last updated 6th February 2023
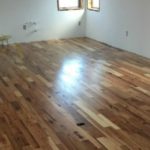
How to Install Engineered Wood Flooring
Flooring makes a dramatic change to your home. In this article we look at how to install engineered wood flooring for a perfect finish

Engineered wood is an outstanding alternative to solid wood floors as it consists of a real wood layer on top of a multiply core. Therefore, it offers the authenticity and aesthetic of real wood, but with outstanding durability and easy maintenance at a fraction of the price. It’s easy to see why this flooring solution is so popular.
To further your savings, you can easily install engineered wood flooring without help and without complication. Here’s a step by step DIY guide to installing engineered flooring by yourself, even if you’re a flooring rookie.
What tools do I need to lay engineered wood flooring?
To begin installing engineered wood flooring, you'll need:
- Tape measure - for accurately cut boards
- Pencil - for sketching out measurements
- Handsaw - for trimming individual boards
- Electric saw - for trimming multiple boards to a set size
- Expansion spacers - to keep a 10mm gap between the floor and the wall, which will allow for expansion and contraction throughout the seasons
- Hardwood floor stapler - this will secure the boards in place. Insert staples at a 45-degree angle and at every 6 to 8 inches
- A rubber mallet - this is handy if you find it difficult to force the boards together
- Nails and finish nailer - though the stapler is particularly proficient it can run into some difficulty when it comes to using it on floorboards close to walls. This is because the tools are usually quite large. To finish off the job use a nail every 12 to 18 inches to complete the installation

Safety tools
DIY can involve a lot of being in an unnatural and uncomfortable position for long periods of time. When installing flooring it's likely that you will be kneeling for long periods meaning that protective tools are essential. To ensure you don't end up in agony, knee pads are an essential purchase.
As you'll also be cutting your engineered wood to size, safety goggles are necessary, as are dust masks and ear defenders.
Before you start
Before you begin fitting boards a handy tip is to avoid having the last board that you fit being less than 60mm wide. To ensure this doesn't happen, simply divide the width of your room by the width of the board, which will tell you how many boards are needed and how wide the last board will be. If less than 60mm, simply trim your first board to a width that means neither your first or last board are smaller than 60mm in width.
Now we'll talk you through how to install an engineered wood floor, step by step.
1. Prepare your Subfloor
It’s important to ensure your subfloor is clean, dry and most importantly, flat. Use a spirit level to measure the evenness of the subfloor and then a levelling compound to smooth it out if need be. To ensure a smooth, even finish it's crucial that you prepare your sub-floor as thoroughly as possible. For this, you will need a brush and dustpan, a hoover and a mop and bucket. First brush the floor, making sure you get into every last crevice to pull out dust, dirt and plaster break-off. Then hoover over the entire surface before mopping to remove any residual dirt or fine debris.
While allowing your subfloor too fully dry, allow your new engineered flooring to acclimatise to its new surroundings. So leave it in its chosen room for at least 72 hours prior to installation.
Related: The Cost of Engineered Wood Flooring
2. Measure Everything
Then, measure the length and width of the room you are planning to lay the engineered flooring. Next, multiply those numbers together to calculate the room’s square area. Each of our product pages has a calculator to measure how many packs you’ll need based on this square area. However, to account for mistakes, add an extra 10% just in case.

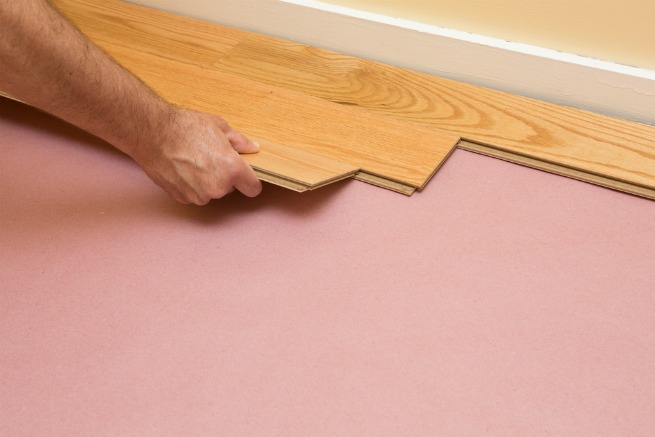
3. Add Underlay
Laying engineered underlay prior to your flooring not only makes your flooring more durable but also adds extra insulation for warmth and soundproofing. Underlays can differ depending on your subfloor. For example, if you’ve got a concrete subfloor, a polyethene film with a moisture barrier is best. If you have underfloor heating, we provide heat therm underlay especially for that.
When laying the underlay, simply place the sheets side by side, trim down with a craft knife or scissors and then tape together and at the seams. Ensure it is completely flat when taping to avoid any bumps in your new flooring.
4. Install
Like laminate, some engineered flooring is incredibly easy to install as there are different types which don't require glue or nails. With its tongue and groove system and click structure, each panel simply fits snugly together. When arranging, it’s recommended to lay the panels horizontally along the longest side of your room to make the room to look bigger.
Start in the corner of the room with the groove facing the wall, keep the panel at least 10mm away from the wall to allow for an expansion gap. This should follow the perimeter of the room and allow the wood to expand or contract due to climate conditions. To help ensure an even expansion gap throughout, plastic spacers are recommended.
Slot each board into each other using the tongue and groove system and tap them firmly into place using a tapping block and hammer. When you reach the end of the first row, you’re likely to have to cut the last panel. Do this using a jamb saw or coping saw. You can use the remnant from this panel to start the next row.
5. Add Beading
After all of your flooring is finally laid, you’ll need to do something about that expansion gap. We offer a range of beading or skirting that will perfectly complement your chosen flooring. After measuring the floor to decipher the length of beading or skirting you’ll require, use a saw to mitre the edges of your beading or skirting to allow it to fit neatly. Finally, fix in position with a hammer and nail, if need be, cover any holes with a small amount of wood filler.
Related: How to Install Vinyl Floors
Our Flooring Calculator
When you browse any type of flooring at Factory Direct Flooring Ltd, each product has a flooring calculator on the page. Simply enter the surface area in either metres or feet squared and our My Project flooring calculator will tell you how many packs you’ll need and how much it will cost you.
By simply measuring your room and entering your dimensions, we will provide you with an instant price which will show on every type of flooring you browse across our website. You can either input the total coverage or your width and length measurements, in meters or feet. You can even save your measurements room by room to make your shopping experience stress-free.
It also offers to add an extra 10% for wastage. While this may cost a little bit more, we highly recommend adding it just in case there are mishaps during the installation process. Enjoy the My Project flooring calculator below:
That’s it! Enjoy your new engineered wood flooring!