No matter what type of flooring you are about to lay in your home or commercial property, it is very important that the subfloor foundation is level. Having levelled subflooring will ensure there is no sagging or gaps when installing your new flooring. If you have uneven flooring and are wondering how to level a floor, simply follow our step by step guide below.
How Do I Determine Floor Level?
Step 1
Place a carpenter’s level on the floor. The size of the level will depend on the room size. Look at the levelling bubble to determine where the floor is uneven. Mark the uneven areas with chalk. Normal standards for BS8203:2017 requires SR1 surface regularity to be no more than 3mm over 2mtr straightedge.
Step 2
Lift one end of the level until the bubble indicates it is at an even position. With a tape measure, determine how far out the level of the floor is. Make a note of this.
Step 3
Repeat these steps until you have covered the whole surface of the subfloor.
10 Step by Step Guide to Levelling a Concrete Floor
1. Clean the floor and remove all furniture
Ensure that all appliances are removed so that the floor is completely clean. Scrape, brush and vacuum any debris away so that the floor is free from all dirt and dust. You should always do a moisture test before you begin the next step in order to establish whether a moisture barrier is required.
2. Fill in large flooring cracks
For this step, you will need a concrete filler bottle. If you have any large cracks in the subfloor, be sure to use filler to seal up the crack completely. Allow time for the filler to dry before you continue prepping the floor.
3. Mark uneven flooring spots
If there are obvious bumps or dips in the subfloor, clearly mark them with chalk. Use a carpenter’s level to work your way across the room assessing the levels.
4. Grind down high spots
If there are spots that are particularly high, use a concrete grinder to grind them down. If you can’t find one to rent, you could always bring in a professional to help you with this step. Ensure all dust is vacuumed away after this task is complete.
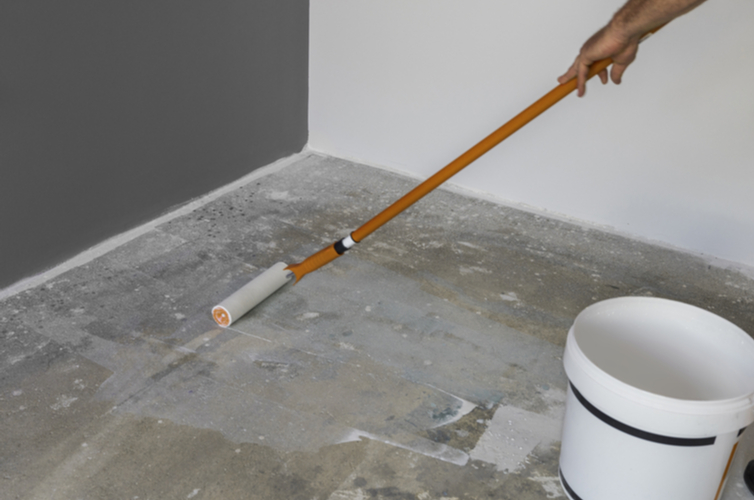
5. Apply primer to the floor
Spread concrete leveller primer evenly across the floor with a soft-bristle broom or roller. Apply some pressure to work the primer into the subfloor. Ensure your primer is smooth, even and that there are no puddles. We suggest a second coat applied in the opposite direction just in case any parts have been missed.
6. Allow the primer to dry
Depending on the climate and the type of primer you have used, drying time can be anywhere between 3 to 24 hours.
7. Mix the self-levelling compound
In a bucket, mix the bag of concrete leveller with water according to the instructions on the packet. The thickness of the floor levelling product will vary from brand to brand. Mix it thoroughly with a drill mounted mixing paddle until the consistency is even. There will only be around 15 to 30 minutes of time before the concrete is no longer pourable and so it is best to only mix one batch at a time.
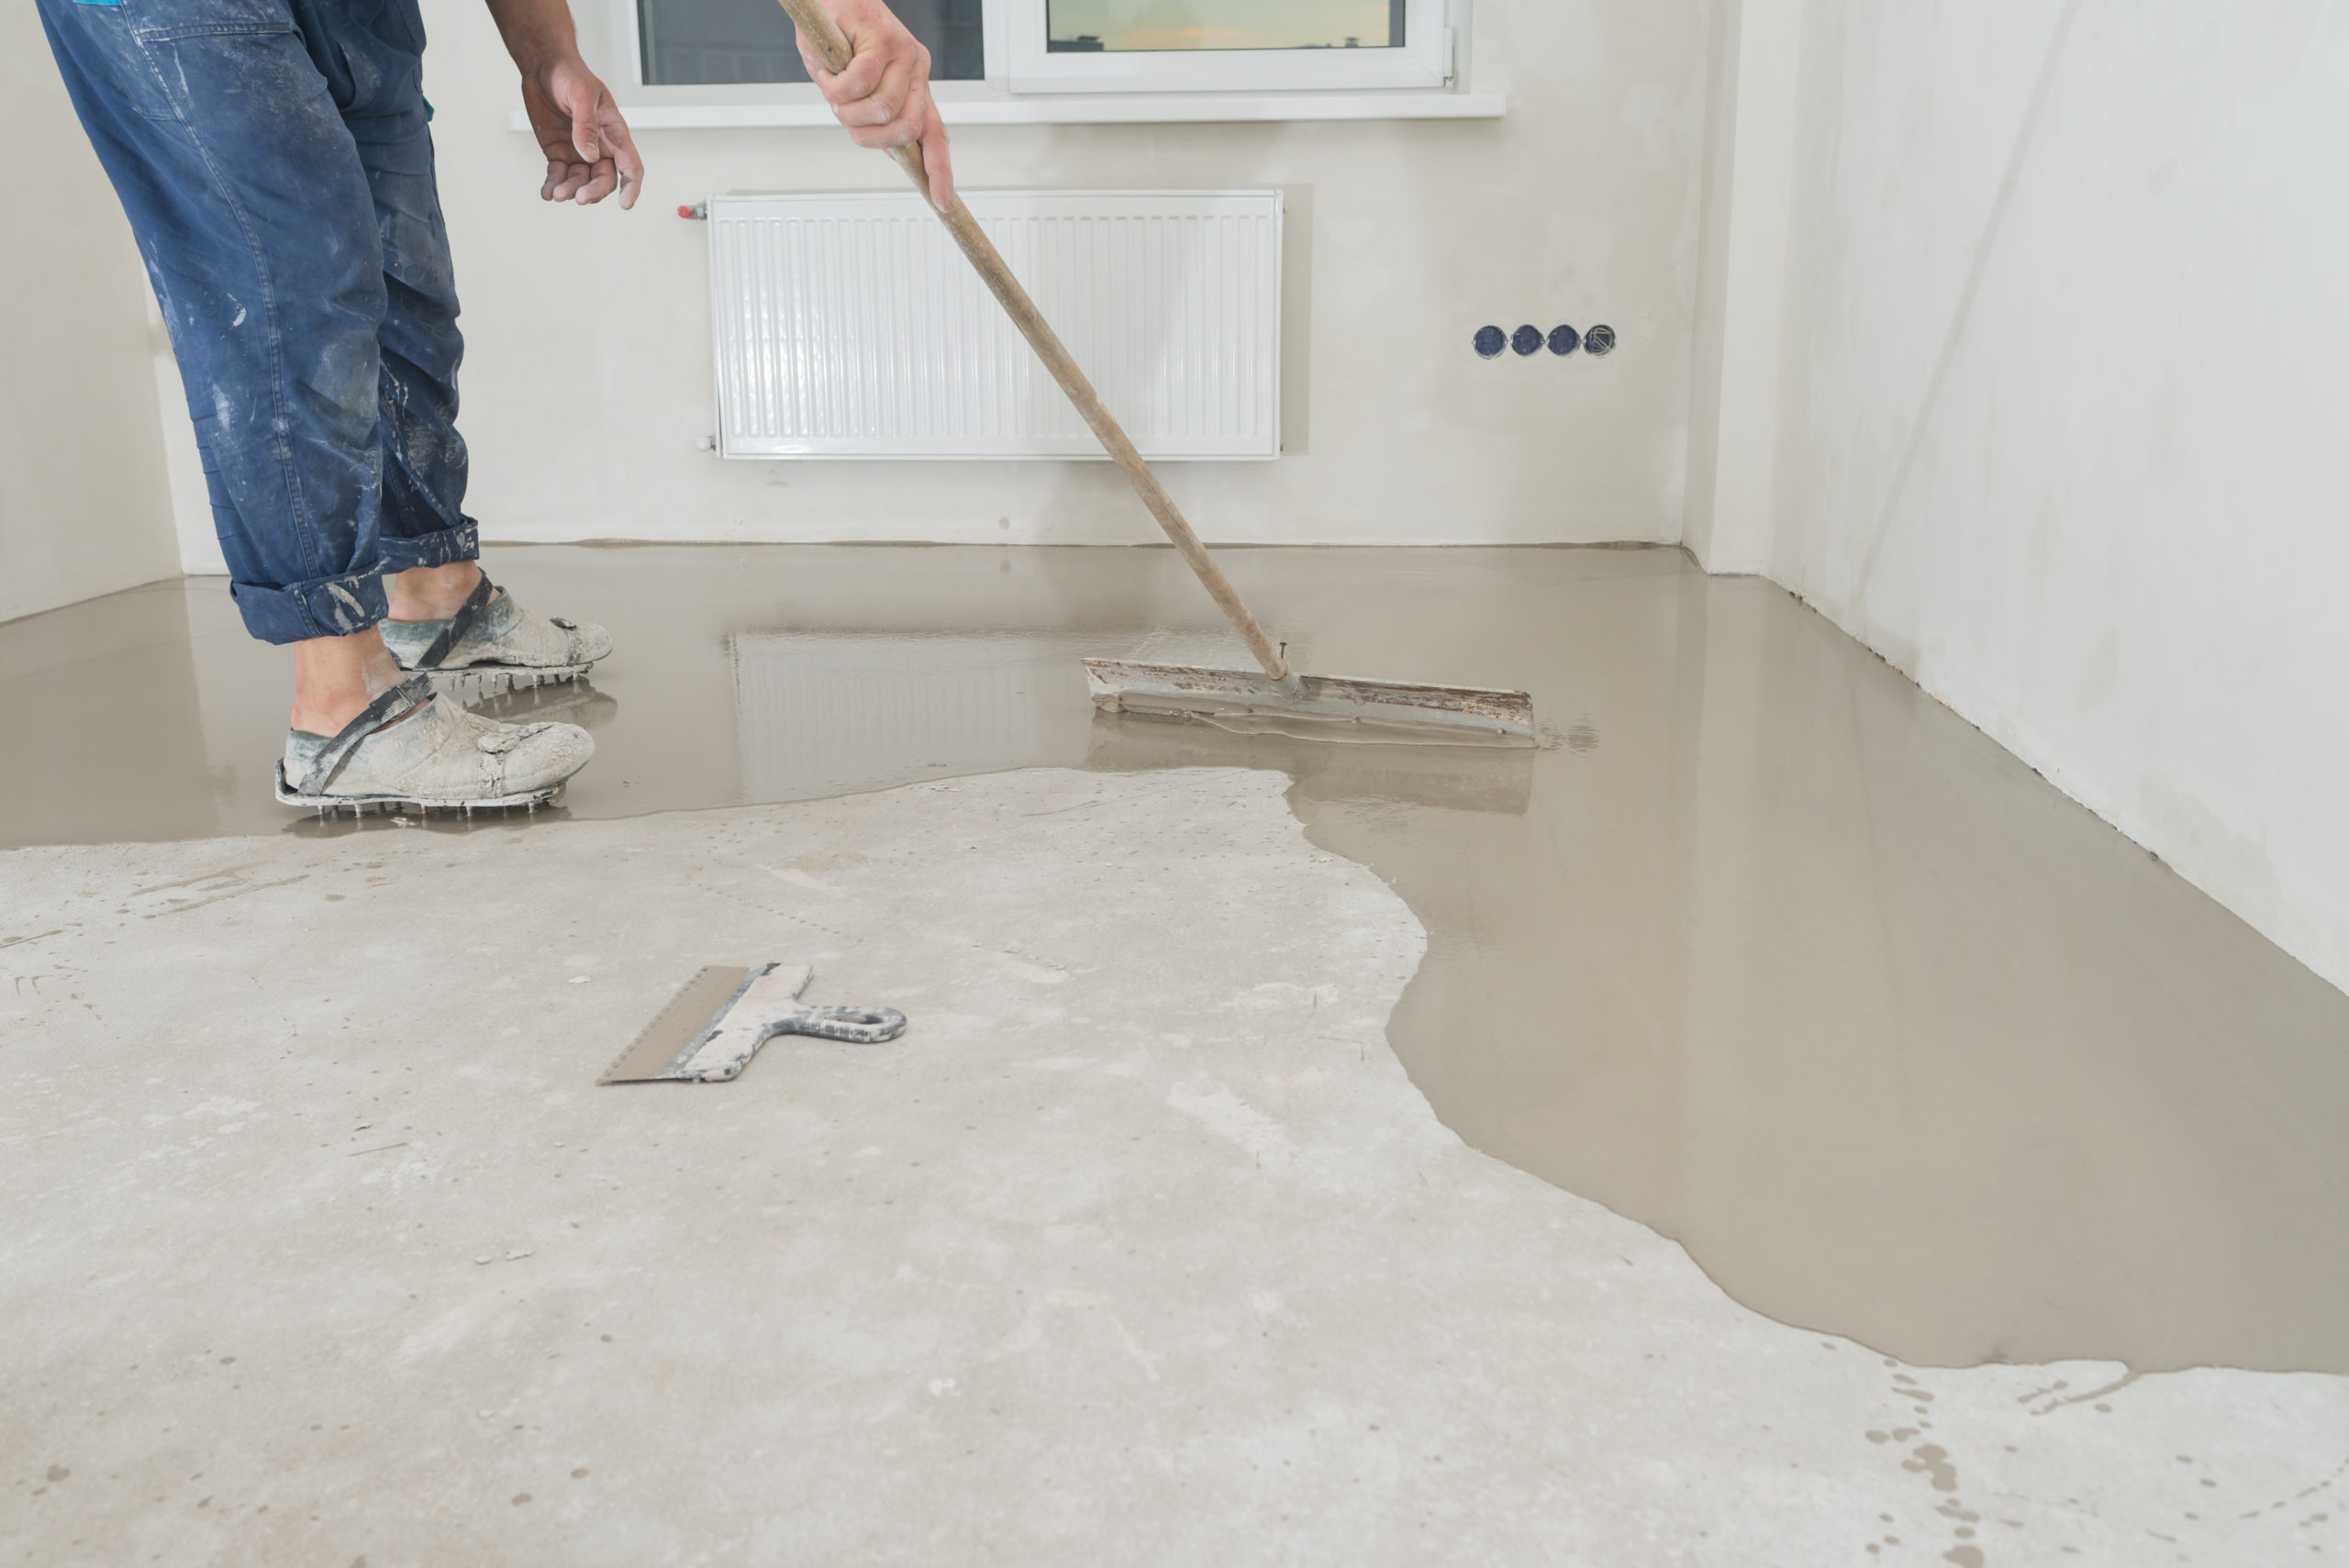
8. Spread the levelling compound
Using a long-handled squeegee, pour the mix onto the subfloor and spread evenly pushing into the corners and edges. A spiked roller can also be used.
9. Let the levelling compound dry
Again, depending on climate and the type of levelling compound used, drying time can be between 4 and 24 hours. Drying time will also depend on what type of flooring you are laying down. Always check the levelling compound instructions as well as the flooring installation manual.
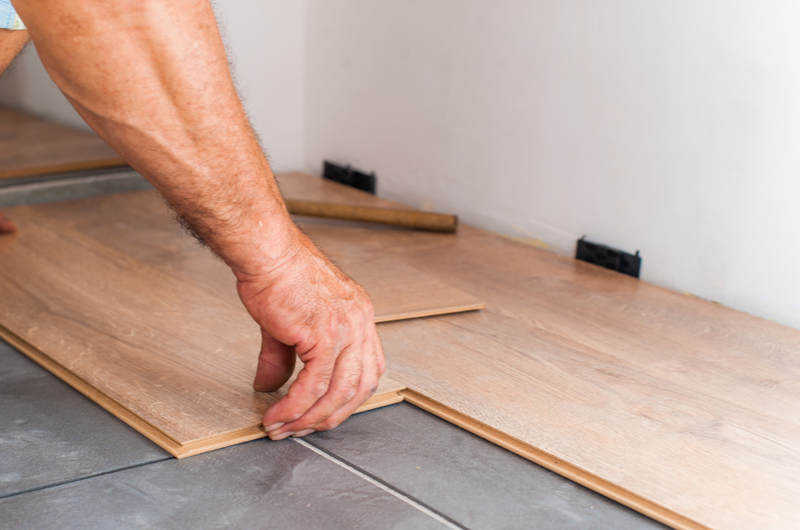
10. Lay your new flooring
By this step, your subfloor should be even, dry and ready for its new flooring.
How to Level a Floor that Slopes
Sloping floors in older homes are considered to be normal and fairly common. Slanted floors can cause cracks around windows and doors becoming a safety hazard. If you have an uneven floor, it will need repairing to avoid any future damage to your property.
The first step of repairs involves controlling excessive moisture near the foundation. For example, installing underground drainage systems and gutters. If controlling moisture levels isn’t successful, you will need to install new floor joists and support posts. This can be done by a professional or by yourself.
Another option for sloping floors is using plywood. This can be a more cost-effective solution. Correcting a drastic sloping floor in the perpendicular direction often requires an extra plywood layer over the entire floor.
What is considered an acceptable slope?
If your floor is sloped ¼ inch in 10 or 20 feet and there aren’t noticeable problems around the house, then the problem is most likely not too serious. However, if the floor is slopping 2 inches in 20 feet or more than this is a great concern that will need to be investigated by professionals. Consult a builder or structural engineer if you have doubts about your slopping floor.
How to Level a Floor that Dips or Sags
If you have a floor that is sagging, it is most likely going to be occurring due to a foundation problem. With older houses, it could also be a sign of tired floor joists. Sagging floors, unfortunately, are most of the time expensive and difficult to fix.
Using hydraulic jacks can sometimes assist you with putting the floor back into position. When using this method, it is important to slowly over time raise the floor up to its original position to avoid cracks and other damage in the house. If you are successful suing hydraulic jacks, you can then reinforce the floor by placing beams underneath. Consider professional help for this project to avoid structural issues and damage.
The best flooring for an uneven floor?
Vinyl and laminate flooring easy to install and work well on uneven surfaces. They conform well to the shape of the subfloor and easily cover small highs and lows in the floor.
Our Flooring Calculator
When you browse any type of flooring at Factory Direct Flooring Ltd, each product has a flooring calculator on the page. Simply enter the surface area in either metres or feet squared and our My Project flooring calculator will tell you how many packs you’ll need and how much it will cost you.
By simply measuring your room and entering your dimensions, we will provide you with an instant price which will show on every type of flooring you browse across our website. You can either input the total coverage or your width and length measurements, in meters or feet. You can even save your measurements room by room to make your shopping experience stress-free.
It also offers to add an extra 10% for wastage. While this may cost a little bit more, we highly recommend adding it just in case there are mishaps during the installation process. Enjoy the My Project flooring calculator below: