
How hard is it to lay herringbone flooring?
It might look incredibly intricate when it’s finished, but laying herringbone flooring is a job that a keen DIYer can do themselves. However, before you get started, take the time to read this guide carefully. You can then decide whether you think it’s a better idea to get a professional fitter in or if you feel confident enough to have a go yourself.What can be achieved?
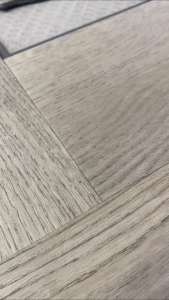
Characterised by zig-zagging rectangular shapes in either wood, laminate or LVT, herringbone floors are a great way to add a unique design element to your home. Herringbone flooring comes in many different colours and variations, with everything from deep and dark hues to much lighter tones. Whatever you choose, you’re sure to get an eye-catching, hard-wearing and versatile result. Hopefully, the images below will provide you with some inspiration for the perfect herringbone floor for your home. [caption id="attachment_3438" align="alignnone" width="1024"]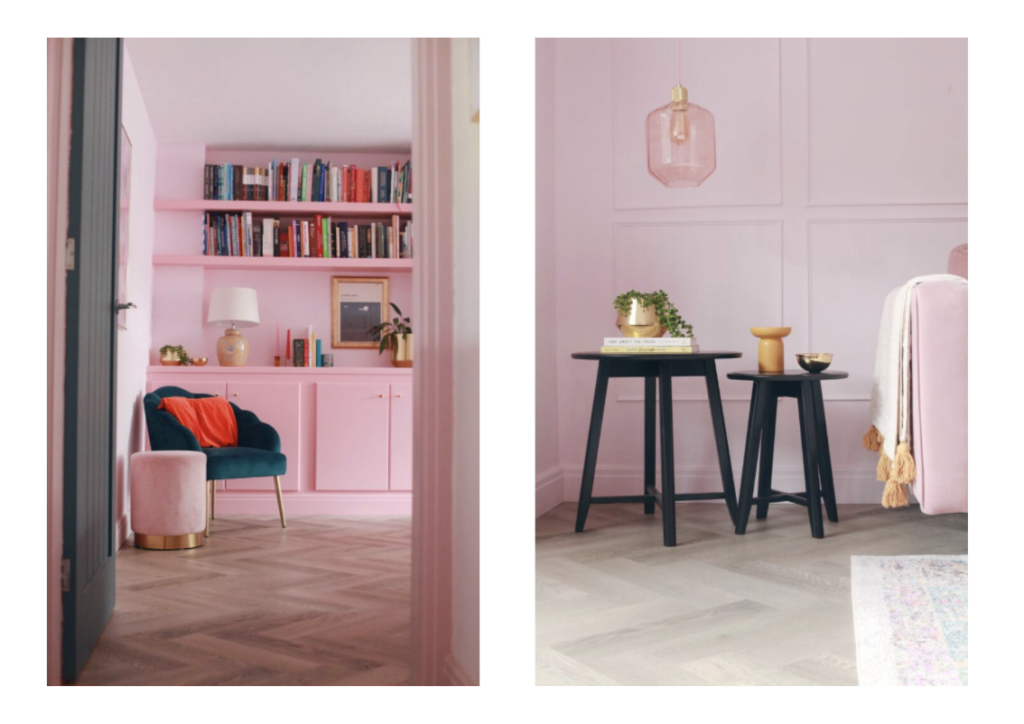 @HalfPaintedHouse[/caption]
View this post on Instagram
Before installation
So, you’ve decided to go ahead with laying the herringbone flooring yourself - good on you! But before you get down to business, it’s important to read these instructions and follow them carefully, as failing to install your herringbone flooring properly will void your warranty.-
Acclimatisation and storage
-
Subfloor
-
Underfloor heating
-
Expansion
-
Tools
- Tape measure
- Set square
- Utility knife
- Rubber mallet
- Tapping block
- Hand roller
- Ruler
- Pencil
- Broom
- Vacuum cleaner
How to install herringbone flooring
How to lay herringbone LVT flooring
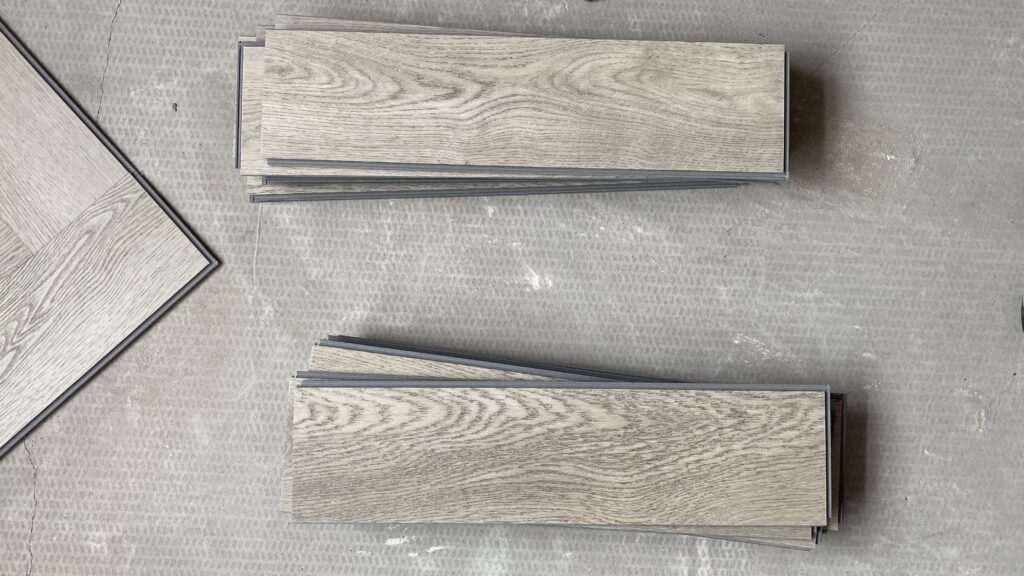
Herringbone luxury vinyl tile floors are also laid by following the steps above. However, in the case of herringbone LVT flooring, there are two different installation types: LVT ‘click’ and LVT ‘glue down’, each of which has slightly different requirements.LVT glue down
Installing LVT glue down herringbone flooring can be a bit more difficult than the ‘tap down’ locking system as it’s more intricate. Therefore, it might be better to leave it to the professionals. If you do choose to install it yourself, then here is our LVT glue down installation guide. When installing your herringbone flooring, please note that every board is constructed with a four-sided click system that allows the boards to fit seamlessly together. You will have A boards and B boards. To create the herringbone pattern, you will need to slot the shorter side of one board (known as the ‘header’ joint) into the longer side of the next board at an angle.LVT click
Below are the instructions to follow when installing LVT click flooring. All of our LVT click flooring products are ‘tap down’ rather than ‘angle’ click products. That makes our herringbone LVT flooring easier to install.Step 1
Make sure your subfloor is level, clean and clear of obstructions such as rugs and furniture.Step 2
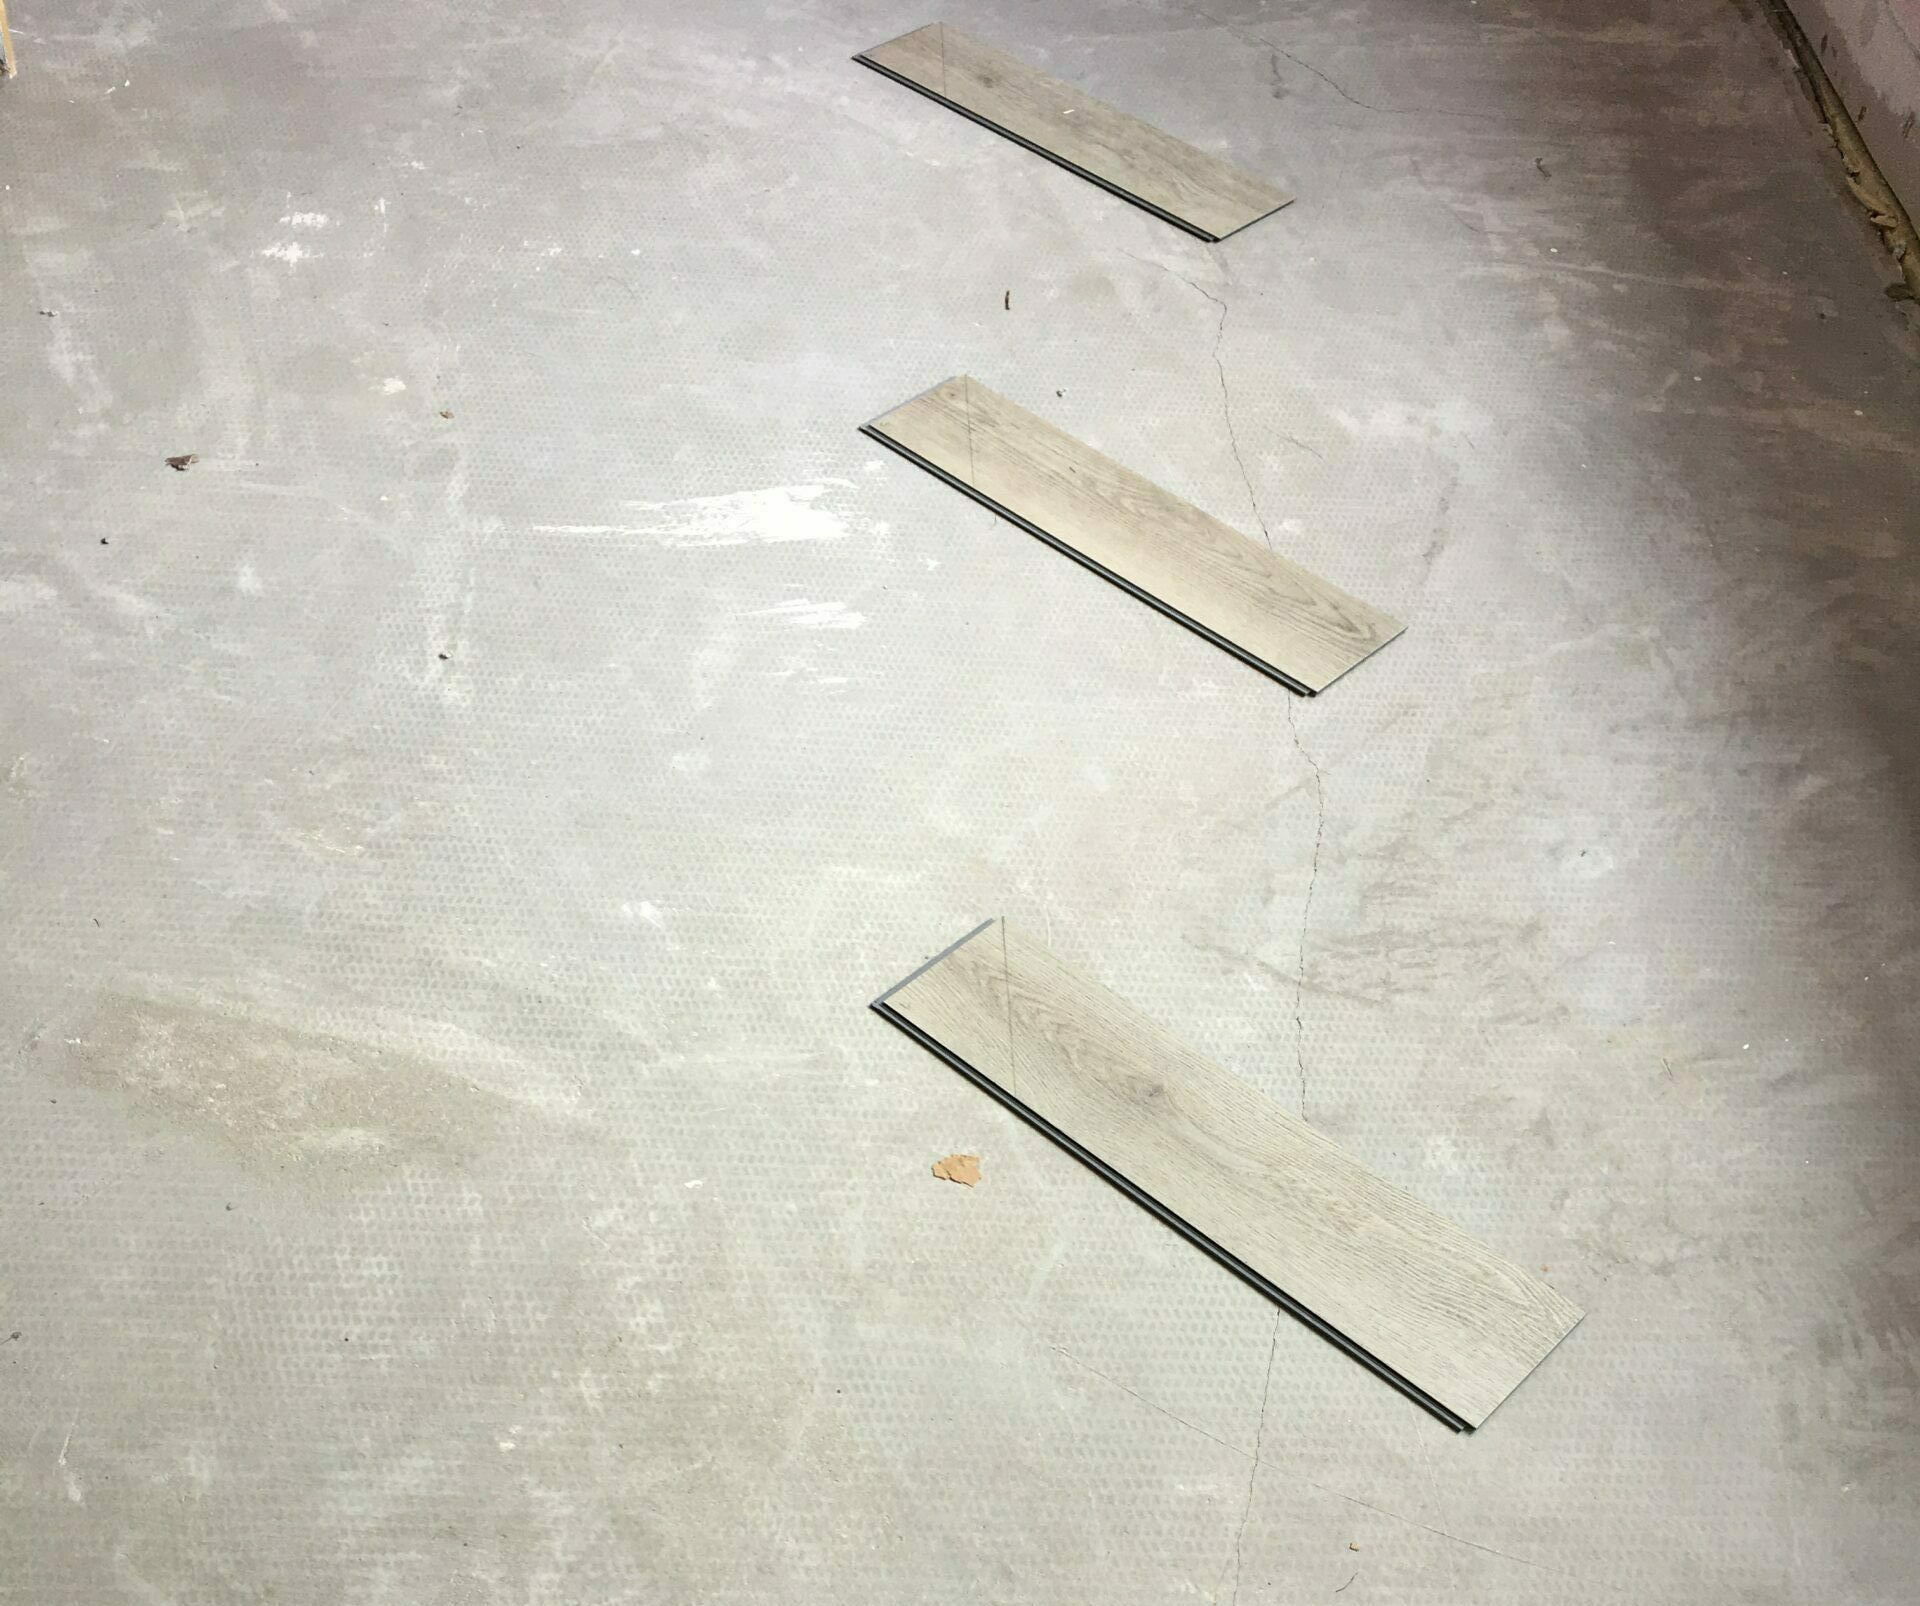
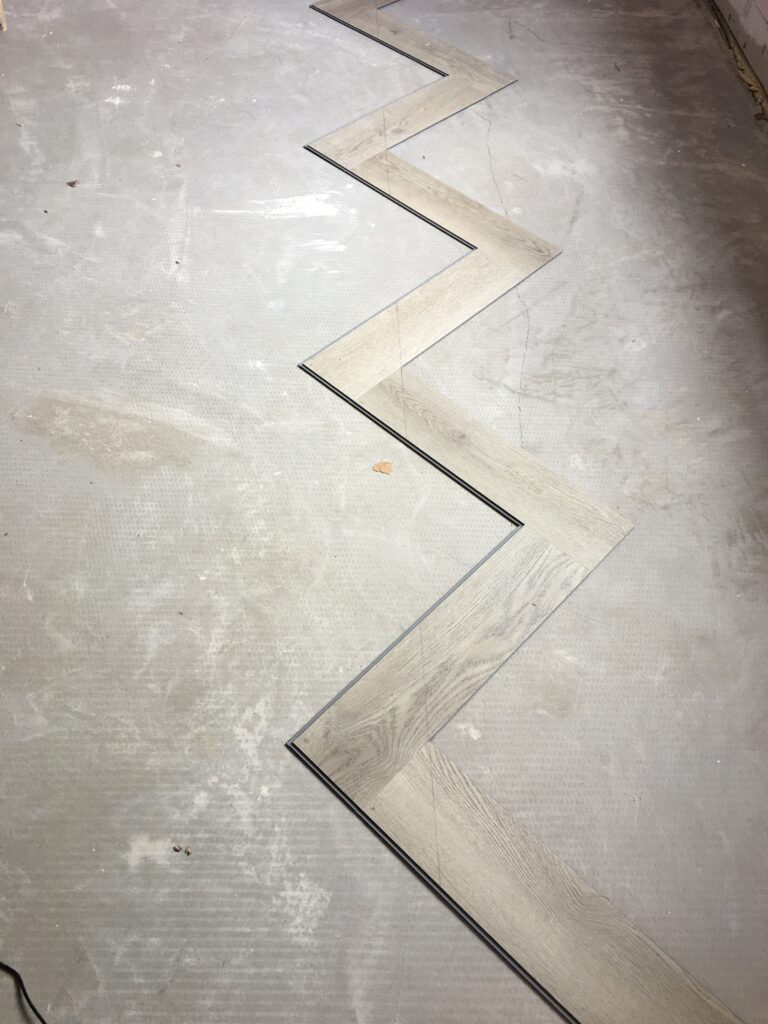
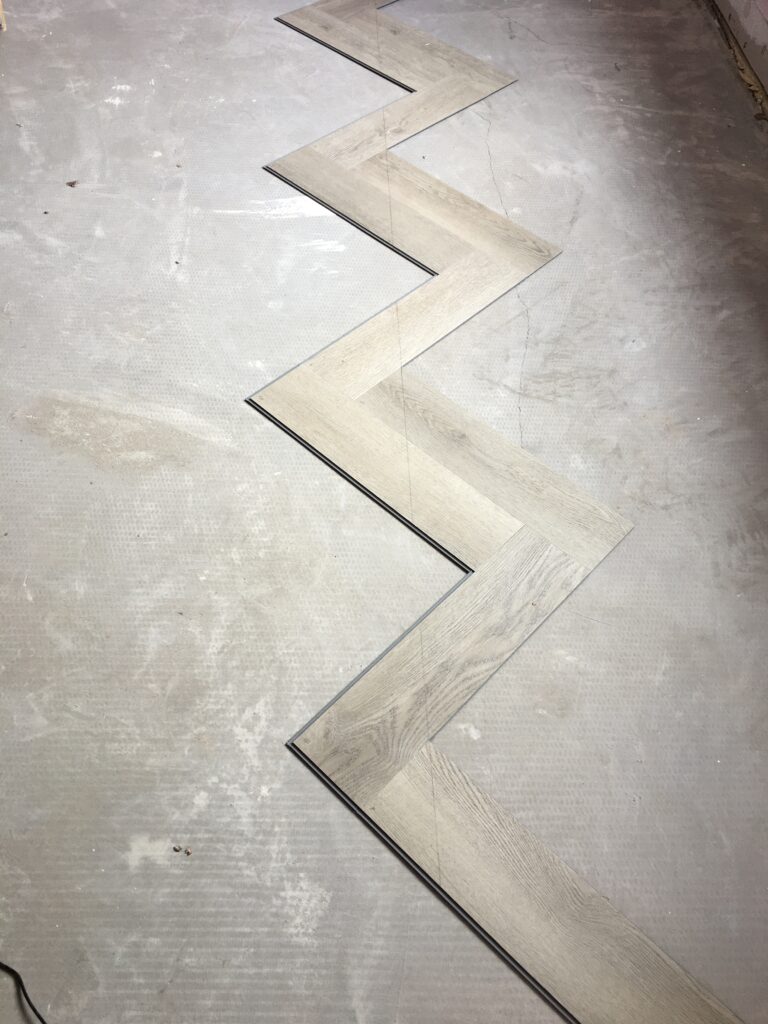
Take three A boards and two B boards. Then click your first B board into the header joint of your first A board to form the classic herringbone ‘V’ shape.
Step 3
Then, get your second A board and click it into place on the right of your ‘V’ shape as you look at it, alongside your first A board.

Step 4
Next, take the second B board and place that alongside your first B board and click it into the header joint of the second A board.Step 5
Then, take your third A board and place that alongside the second A board on the right of the ‘V’ and click it into place.Step 6
Take a fourth A board and click it into the header joint of your second B board.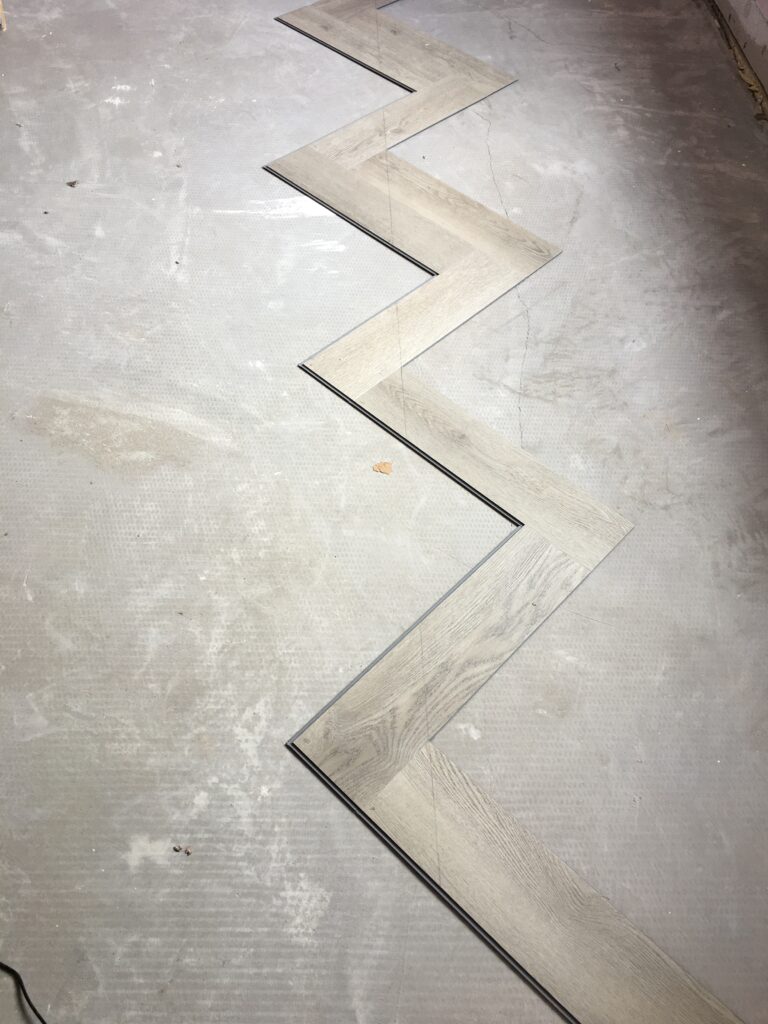
Step 7
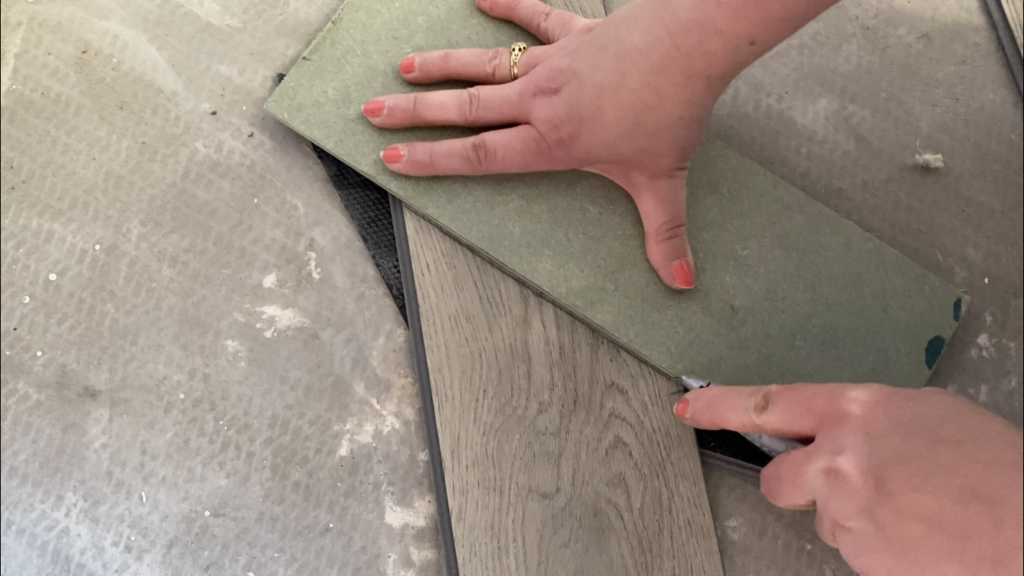
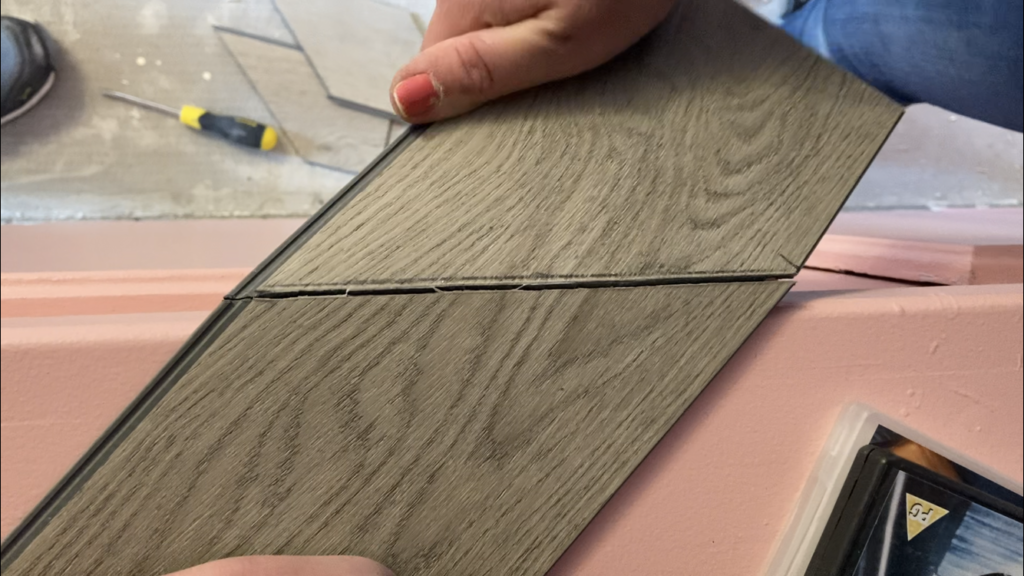
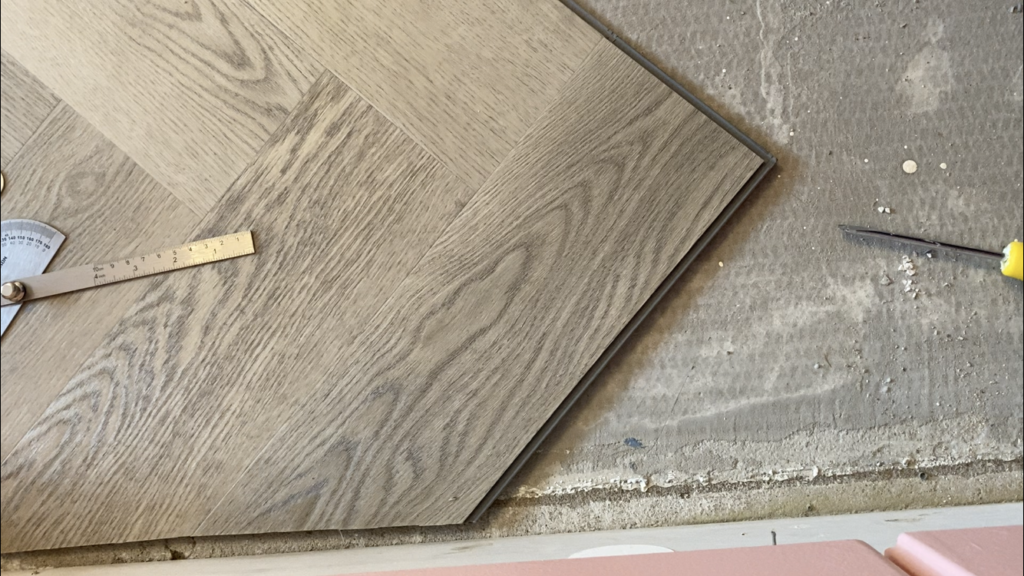
Take your pencil and a ruler and draw a straight line from the top right-hand corner of your third A board to the top right-hand corner of your fourth A board. Then cut along the line with a saw.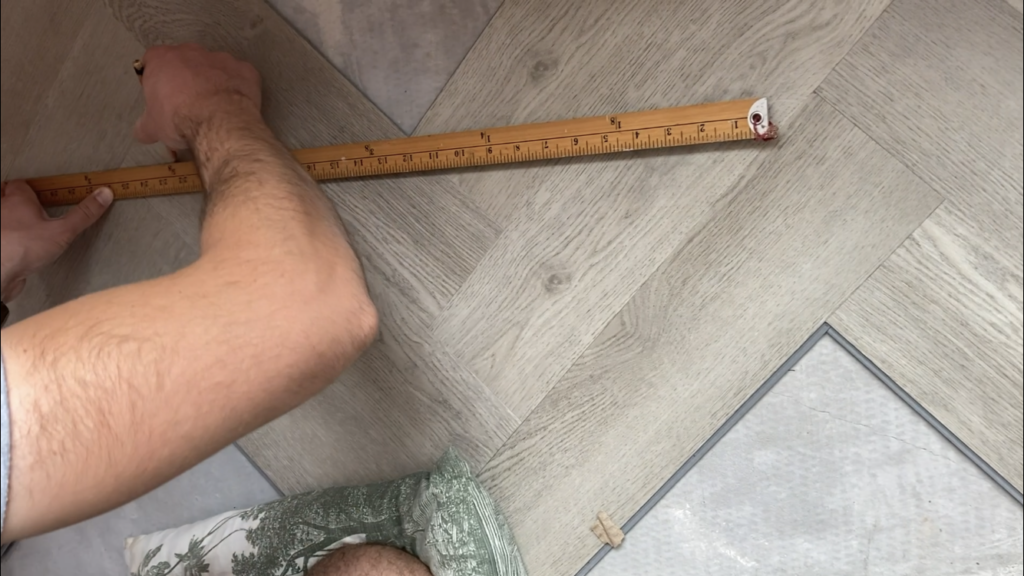
Step 8
That will leave you with an inverted triangle shape. Ensure the boards have clicked together securely.Step 9
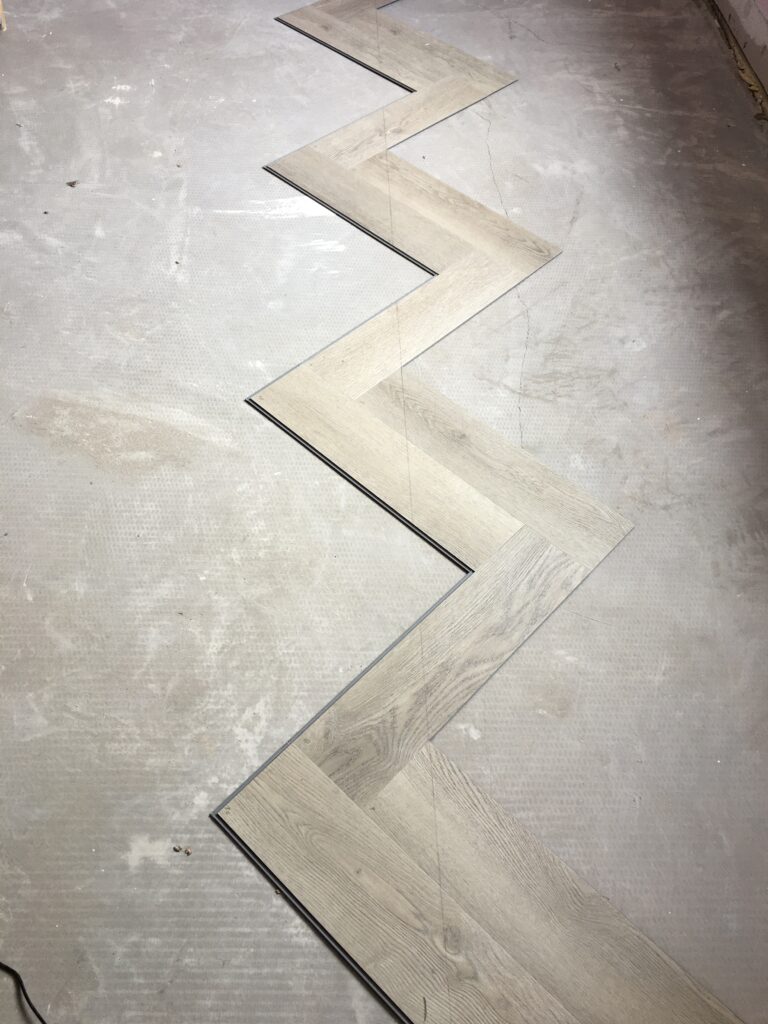
Place your first inverted triangle in the centre of the rear wall. Then, make more inverted triangles and place them along the rear wall to the left and the right of your first inverted triangle. Make sure you leave a 10mm gap between the flooring and the back and side walls.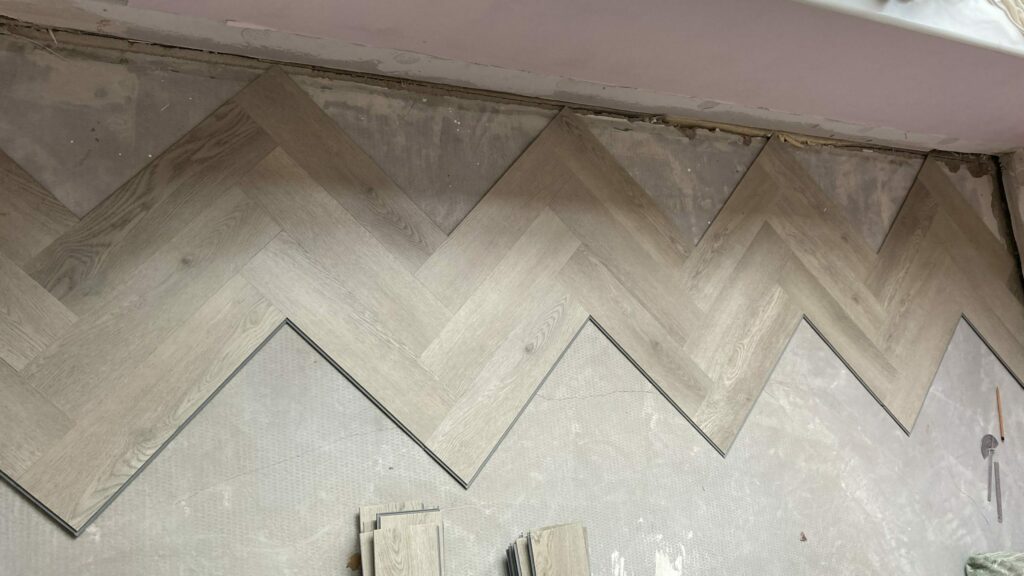
Step 10
When it comes to fitting the final triangles that reach the left and right walls, measure the size of the gap that remains (remembering to leave a 10mm gap to the side walls).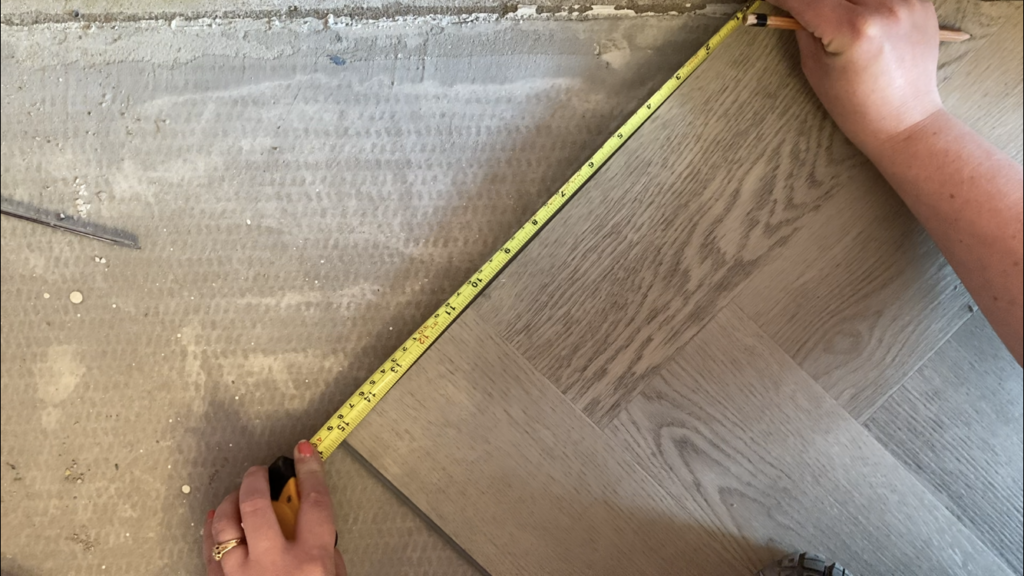
Step 11
For the triangle that reaches the left-hand wall, measure the size of the gap remaining, from right to left, mark it and then cut the inverted triangle with the saw or cutting knife along your mark. For the right-hand wall, measure left to right, mark it and then cut it.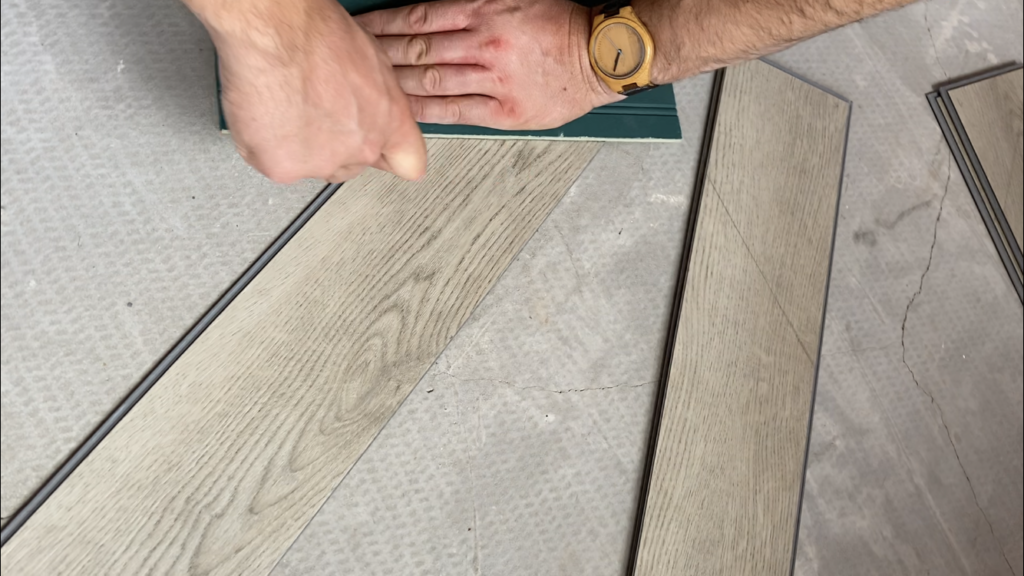
Step 12
Your two inverted triangles will now slot into place against the left- and right-hand walls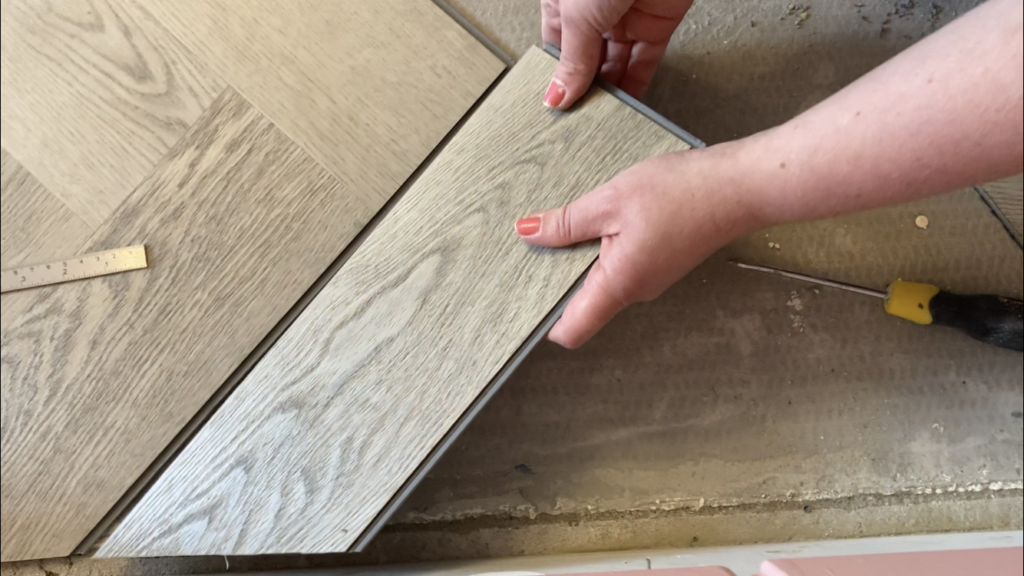

Step 13
Now it’s time to lay the next row of boards. Work from right to left and place B boards to the left of each inverted triangle before clicking them into place.
Step 14
When it comes to laying the final board on the left-hand side of the wall, measure the small section that remains and mark it on your B board.Step 15
Then set your set square to a 45-degree angle to make sure the section fits nicely into the gap.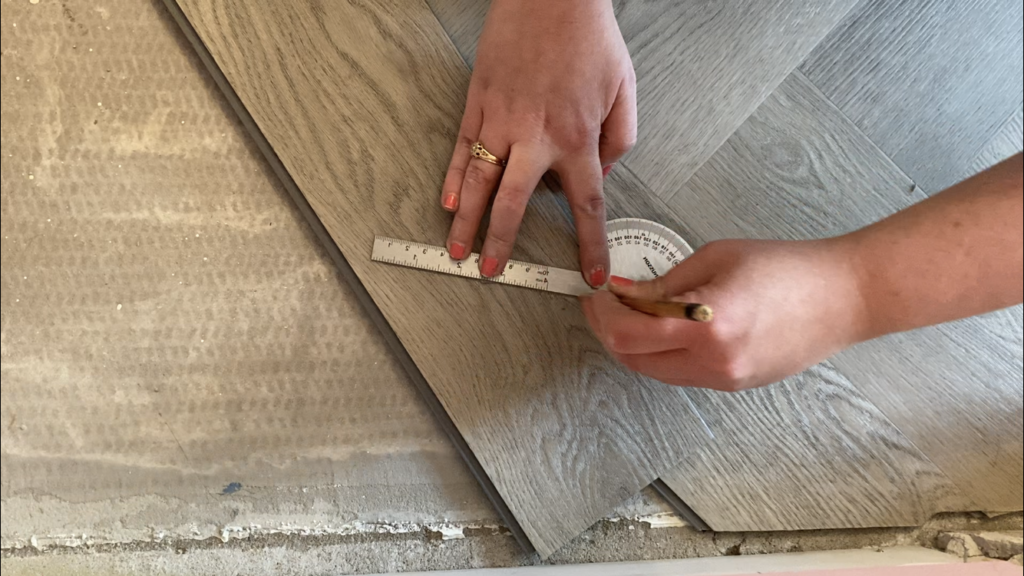
Step 16
Now click the board into the gap to make sure that it’s sturdy and stable.Step 17
Now you can lay your next row of boards. Work from right to left and place your A boards on the right side of your inverted triangles and click them into place.Step 18
The first A board you place will need to be cut to fit the space and stuck into place in the same way as the final B board.Step 19
Continue this method of laying the boards, laying your A boards from left to right and B boards from right to left.How to lay different types of herringbone floors
Although you will need to follow the above steps when laying any type of herringbone floor, there are also a few different things that you’ll have to consider with each flooring type.How to lay herringbone laminate flooring
Although the above steps apply, there are specific installation instructions for herringbone laminate floors so you can check that you’re getting it right. Although there’s little colour variation within laminate floors, we’d recommend opening a minimum of three packs of boards and mixing up the grain pattern and shade variation to get a consistent result.How to lay herringbone engineered wood flooring
Again, you can follow the steps listed above when laying herringbone engineered wood flooring. However, there are also a few important differences that you should be aware of. Firstly, engineered wood flooring must be left to acclimatise in the room where it is going to be installed for at least 72 hours. As engineered wood flooring will expand and contract more than laminate or LVT flooring, you should also leave an expansion gap of at least 10mm around the sides of the room. Read our herringbone engineered wood flooring installation guide.How to install herringbone hardwood flooring
You can follow the installation steps above when installing your herringbone hardwood floor. However, you should also be aware that solid wood floors must be left to acclimatise for a minimum of 120 hours in the room where it is going to be installed. Just like engineered wood, solid wood floors also need an expansion gap of 10mm.How to care for your herringbone flooring
The beauty of laminate and luxury vinyl tile flooring is just how easy it is to look after. All it takes are a few simple steps to keep your herringbone floor in the best possible condition.- Remove loose dirt and debris from your floor using a dustpan and brush, electrostatic wipes or a vacuum cleaner.
- Remove spills quickly and rinse the floor with warm, clean water.
- When cleaning the floor, only use cleaning products and disinfectants that are PH neutral.
- Avoid swamping the floor with detergent and water. Use it sparingly and remove all liquids from the surface to prevent dirty water and detergent from settling.
- Never use abrasive cleaners, scourers, waxers or floor polishes on your herringbone floor.
- Avoid dragging or sliding heavy items of furniture across the floor.
Herringbone flooring FAQs
-
How do you lay herringbone parquet flooring on concrete?
-
How to lay herringbone flooring with a border