Originally posted 28th November 2016
Last updated 7th June 2022
How Do I Remove Laminate Flooring?
If your laminate flooring has become a little worse for wear, or if you just...
If your laminate flooring has become a little worse for wear, or if you just fancy a home makeover, it’s time to be out with the old and in with the new. Removing laminate flooring can easily be done as a DIY job and because laminate flooring is usually installed using the floating floor method and no glue, it can be removed fairly quickly. If you want to remove laminate flooring yourself, just gather these tools and follow this handy guide.
Related: The Cost of Laminate Flooring
Tools to Remove Laminate Flooring
- A pinch bar
- A claw hammer
- A chisel
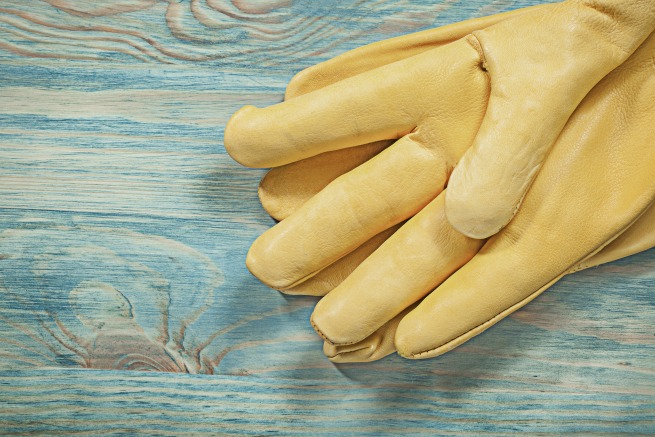
- Safety goggles
- Protective gloves
How to Remove Laminate Flooring
1. Start by putting on your safety goggle and protective gloves. Removing laminate flooring can result in lots of splinters and grazes. So, although this sounds tedious, trust us.
2. For the first part of laminate floor removal, start removing the skirting boards or beading around the perimeter of the room. Using the pinch bar, start near the door and wedge the pinch bar between the skirting board and the wall and hit it with the hammer. Then lever the skirting board away from the wall. Do this until all the skirting or beading has been removed. If you need to remove any nails along the way, use the claw of your hammer.
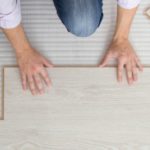
3. Once you can easily access the laminate boards, remove the first board nearest the wall by wedging a chisel between the board and the floor at a 45-degree angle. Lever this until the board can unsnap from the pieces it's connected to. Do this to the rest of the board across the first row, then start on the second row and continue until your room is laminate free.
4. If your laminate flooring happens to be glued to the sub-floor, it might be a bit more difficult. If the above manual step doesn’t work, try using a heat gun which will melt the glue underneath, allowing all the boards to be removed.

Our Flooring Calculator
When you browse any type of flooring at Factory Direct Flooring Ltd, each product has a flooring calculator on the page. Simply enter the surface area in either metres or feet squared and our My Project flooring calculator will tell you how many packs you’ll need and how much it will cost you.
By simply measuring your room and entering your dimensions, we will provide you with an instant price which will show on every type of flooring you browse across our website. You can either input the total coverage or your width and length measurements, in meters or feet. You can even save your measurements room by room to make your shopping experience stress-free.
It also offers to add an extra 10% for wastage. While this may cost a little bit more, we highly recommend adding it just in case there are mishaps during the installation process. Enjoy the My Project flooring calculator below:
Get instant Personalised Pricing for your room
- Enter your unique room measurements.
- We'll give you an instant price for the flooring you need in your home.
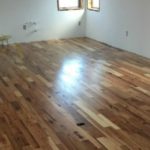
How to Install New Laminate Flooring
Once your laminate has been removed, it’s time to think about laying your new flooring. Chances are, there will already be a layer of underlay from the previous laminate. It’s recommended to continue using this unless the underlay is noticeably damaged or you fancy using a different type of underlay. If you require new underlay, browse our Laminate Underlay Section. Any new underlay will have to be trimmed down and taped together and at the seams.
Once your underlay is sorted, take your new laminate flooring out of its packaging and allow it to acclimatise for at least 48 hours. This will help you to avoid any future problems, such as your flooring expanding.
Related: How to Install Laminate Floors
Now it’s time to lay your new laminate flooring. This usually has a simple click system. So, start by laying the planks onto your underlay from the left-hand corner of the room and click each into place as you go. Remember to leave a gap of roughly 8-10mm around the perimeter of the room to allow space for your beading or skirting. Finally, add in the beading or skirting using adhesive or a hammer and nails. To browse our laminate flooring section simply browse our laminate section.
We hope this helps you remove your laminate flooring! If you need any more advice please call us on 0330 100 00 15.